Tuesday, 6 September 2022

Woven seats in ancient Egypt (Part 2)

 Now here's a stool dating back to 1600 BC, from the 17th Dynasty. The wooden frame is tamarisk, and the seat is woven from rush. It's about 13cm high. That might seem quite low to us, who are used to much taller seats, but in ancient Egypt people were accustomed to sitting on the ground most of the time, so even a little stool like this would elevate you above everyone else. 

It seems to be quite a common pattern among seats of that vintage. So far as I can make out, the rush isn't twisted the way we'd twist rush for modern seats in the traditional rush pattern,  but it must be twisted a bit, in order to create those long fine strands. 

The rush is wrapped around the frame, and then looped back over itself (  See the stool I recently did  with cord, which is looped in a similar way. ) This creates a single-layer seat, unlike the stools we commonly make nowadays where we wrap the cord all the way round, underneath the seat, making an upper and lower layer (which takes more work, and requires more material!)

The other thing I notice is that there  don't seem to be any intermediate, short wraps round the frame in between the strands strands that cross the seat. (Though it's difficult to make out in this rather small photo. There might be single wraps in between.)

 It's a simple, but pleasing pattern, and I may try it with fine, ready-twisted rush on one of our 12-inch stools. Actually working the pattern would make it easier to see what the original seatweavers did.

But.... Isn't it wonderful to see such well preserved furniture from 3½ thousand years ago?  The dry conditions in Egypt helped to preserve such things of course, but I'm pretty sure our own ancestors weren't making pretty furniture back then.

Below is my take on the pattern. I haven't bothered to draw it all the way across the stool, but you can what I've done. Does it need intermediate wraps? I think it probably does, otherwise the loops would interfere with each other. Watch this space: I'll show you my experiments when I try to do it myself.


If you'd like to try it yourself, you can buy fine, ready-twisted rush from our website, here: Fine ready-twisted rush

Saturday, 3 September 2022

Woven Seats in Ancient Egypt (Part 1)

Woven seats go back a very long way. They have been found, still in very good condition, preserved in ancient Egyptian tombs. 

Now, what I really want to do is copy the photos I'm finding, but some are under copyright, so I'll try to link to the relevant websites instead. The one below has several beautifully clear photos which can be zoomed right into, so you can see the pattern of the seat in great detail.


This is a lovely specimen, which can be found in the British Museum. The chair was found near Thebes, and is made from inlaid acacia wood, and the seat is woven in a diagonal pattern with fine cord. It's a simple pattern, but one I've not come across in modern chairs. It could easily be replicated on any chair with holes round the edges – obviously those designed for caning would work, but the holes might need to be a bit bigger. 
Above: simplified diagram of ancient Egyptian woven seat pattern


There are groups of 3 strands of cord going in one direction, and 4 strands going in the other, and each hole takes 2 sets of threes and 2 sets of fours, so would need to be large enough to accommodate 14 strands of  fine cord. (I'm guessing about 2mm.)

It's not clear how the cord is held in place underneath. I'd imagine it's knotted in some way. If I was trying to replicate the pattern (and I might at some point in the future!) I'd try to work out a way of doing it neatly. Remember that the underside of the seats we weave should be as neat and tidy as possible, even though they're not often seen!

We should also remember that the seatweaver who produced this lovely chair wouldn't have been able to contact SitUpon Seats to place a simple order for fine chair cord. (Not something we stock,  but we could order something similar!) It would have to be twisted by hand, laboriously (perhaps by slaves?), mile after mile of the stuff. Someone would have had to harvest the plant material from which it was made (papyrus was the commonest material for cordage), strip it down (only the rind of the stem was used for fine cord), clean it, dry it, and then twist these enormously long strands. I've made short lengths of rope with rush or heavy cord, just to see how it's done, and even using thick material and only going for a couple of metres of the stuff, it's time consuming. 

The papyrus used for fine string was made from offcuts of the rind left over when they were making papyrus sheets for writing on. It's incredibly strong stuff and could make tough but fine cord. 

[To be continued ...]


Thursday, 1 September 2022

REFURBISHING A TIRED OLD STOOL


There are lots of these little 12-inch stools about, mostly worked some years back in seagrass or brightly coloured polycord. They're wearing out now. Some of our customers are keen to have their stools re-done in exactly the same style as the original, and all I have to do is remove the old material, clean up the frame, and work the seat with seagrass in the traditional chequerboard pattern. 


It's rather nice, though, to have a customer who wants something different. This stool had belonged to her son when he was young, and had  bright green polycord wearing away on its surface. She told me that now that he's an adult he prefers calm, muted colours, and provided me with a tin a grey paint to cover the frame. This took a bit longer than I thought as it required several coats to get a nice, smooth surface. 


She asked if I had any grey cord, so I showed her our lovely silvery flax cord, which is so soft and nice to work with. The only trouble with this stuff is that it stretches a bit in use, so can't really be used on its own on a seat. But this gave me an opportunity to try something I'd had ticking over in my mind for a while: a hybrid seat, with warp strands in a tough cord and soft flax cord for the weft. I suggested Danish cord for the warp.

I used the "no-nails" Danish cord pattern, which can be found in our bestselling book. This relies on the strands of cord looping over themselves at the sides, rather than being fixed to L-shaped nails underneath (as in the more common Danish cord seats) or being wrapped all the way round (as in traditional styles like the cheuquerboard pattern. 


Wrapping the cord over itself creates a pleasing pattern of little knots round the edges, as you can see in the photos.

I'm quite pleased with the result, and it's a new design for me.

 CLICK BELOW TO BUY THE SITUPON SEATS DANISH CORD BOOK!

SitUpon Seats Instruction Books


CLICK BELOW TO BUY SOFT FLAX CORD

(Scroll down the page when you get there.)

Flax and other natural cords


CLICK BELOW TO  BUY DANISH CORD

Danish cord


Saturday, 16 July 2022

An unusual long stool

This customer had a long footstool, of the same construction as a typical seagrass stool, except that it's three times as long. At some point in its history, a previous owner had had it upholstered with a padded seat, and elaborate piping round the edges. It must have looked amazing when it was newly done, but the fabric was worn and dirty, and urgently needed a new lease of life. Mrs S just wanted it looking decent again so that she could put her feet up on it.
(Above) The stool prior to starting work on it

I suggested that it might be better to re-do it with a woven seat, which would be better suited to that sort of frame, and she agreed with me. 

I started stripping off the upholstery, which took AGES, as there were so many nails embedded in the hard wood of the frame. I also discovered that the side bars of the frame were badly warped. It seems the weight of the upholstery, and many years of it being sat on, had caused the side bars to twist. A stool of that length really needs a stabilising bar of wood in the middle, to keep it straight, but such a thing was missing here. You can see the result quite clearly in the photo below.


I removed the rest of the webbing and nails, and had a look at the side bars, which were impossible to unbend. Mrs S thought it would be perfectly fine just to leave them warped, if it was possible to weave a pattern over them, so I just twisted them back,  glued them in place, and added a stabilising bar in the centre.

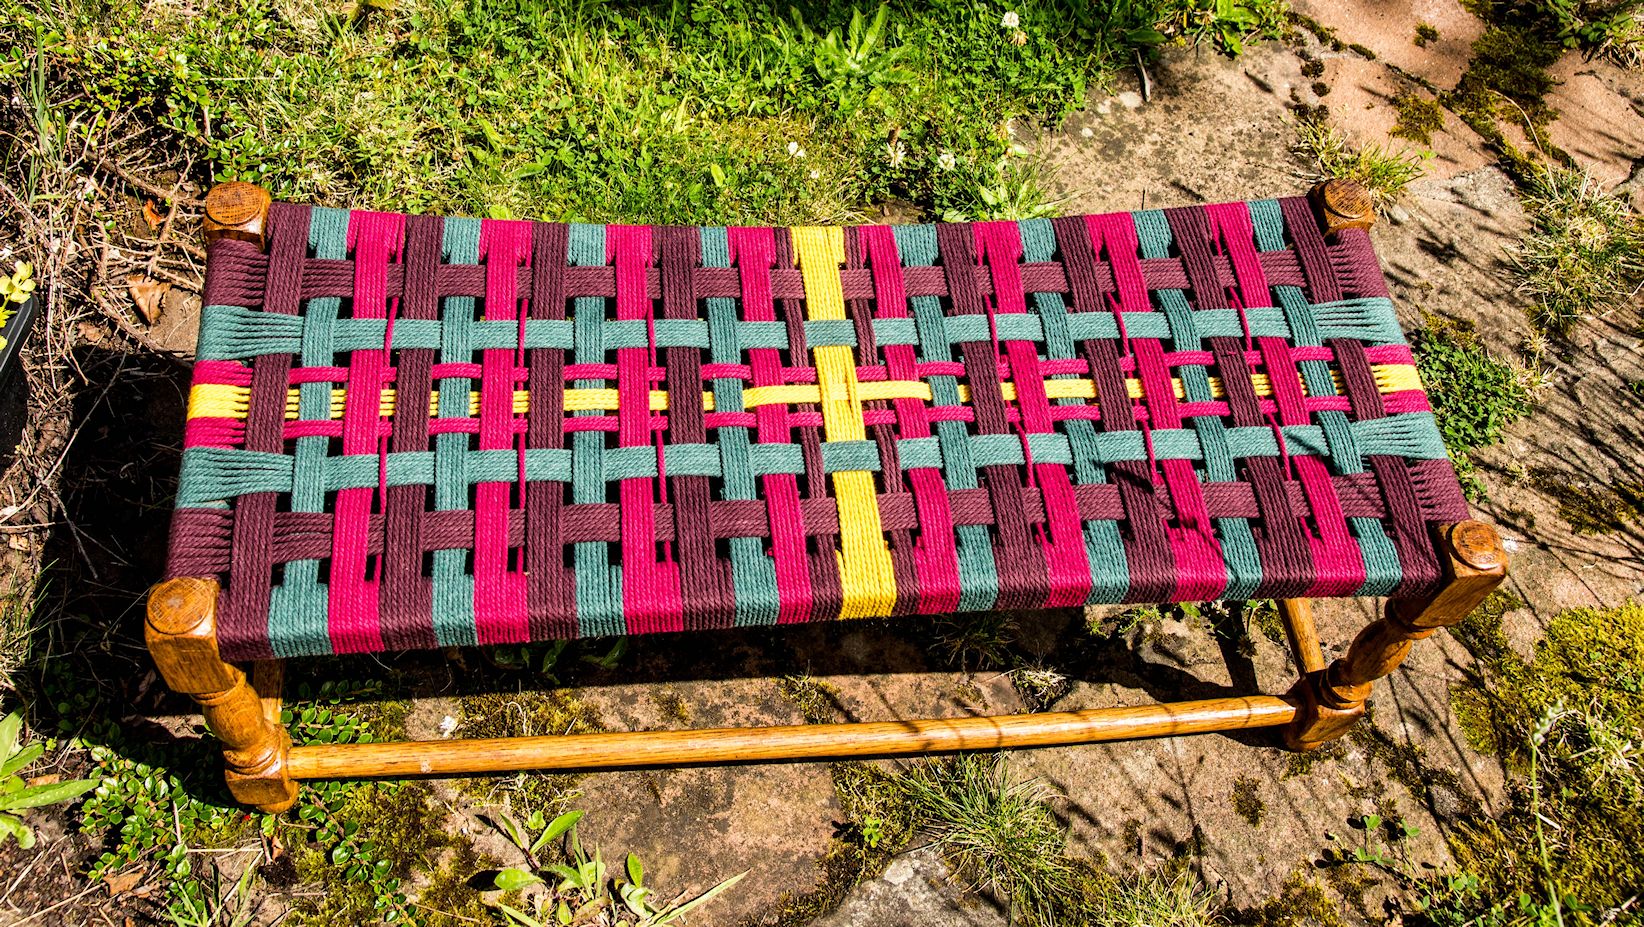
Mrs S rather bravely left it to me to decide on the pattern. She wanted mainly darker colours that wouldn't show the dirt (as it's used as a footstool) so I picked out some nice warm dark colours of cotton cord, with a flash of yellow to make things stand out. I started off with a pattern I'd designed on paper, but soon realised it was too elaborate and ended up just making it up as I went along. 

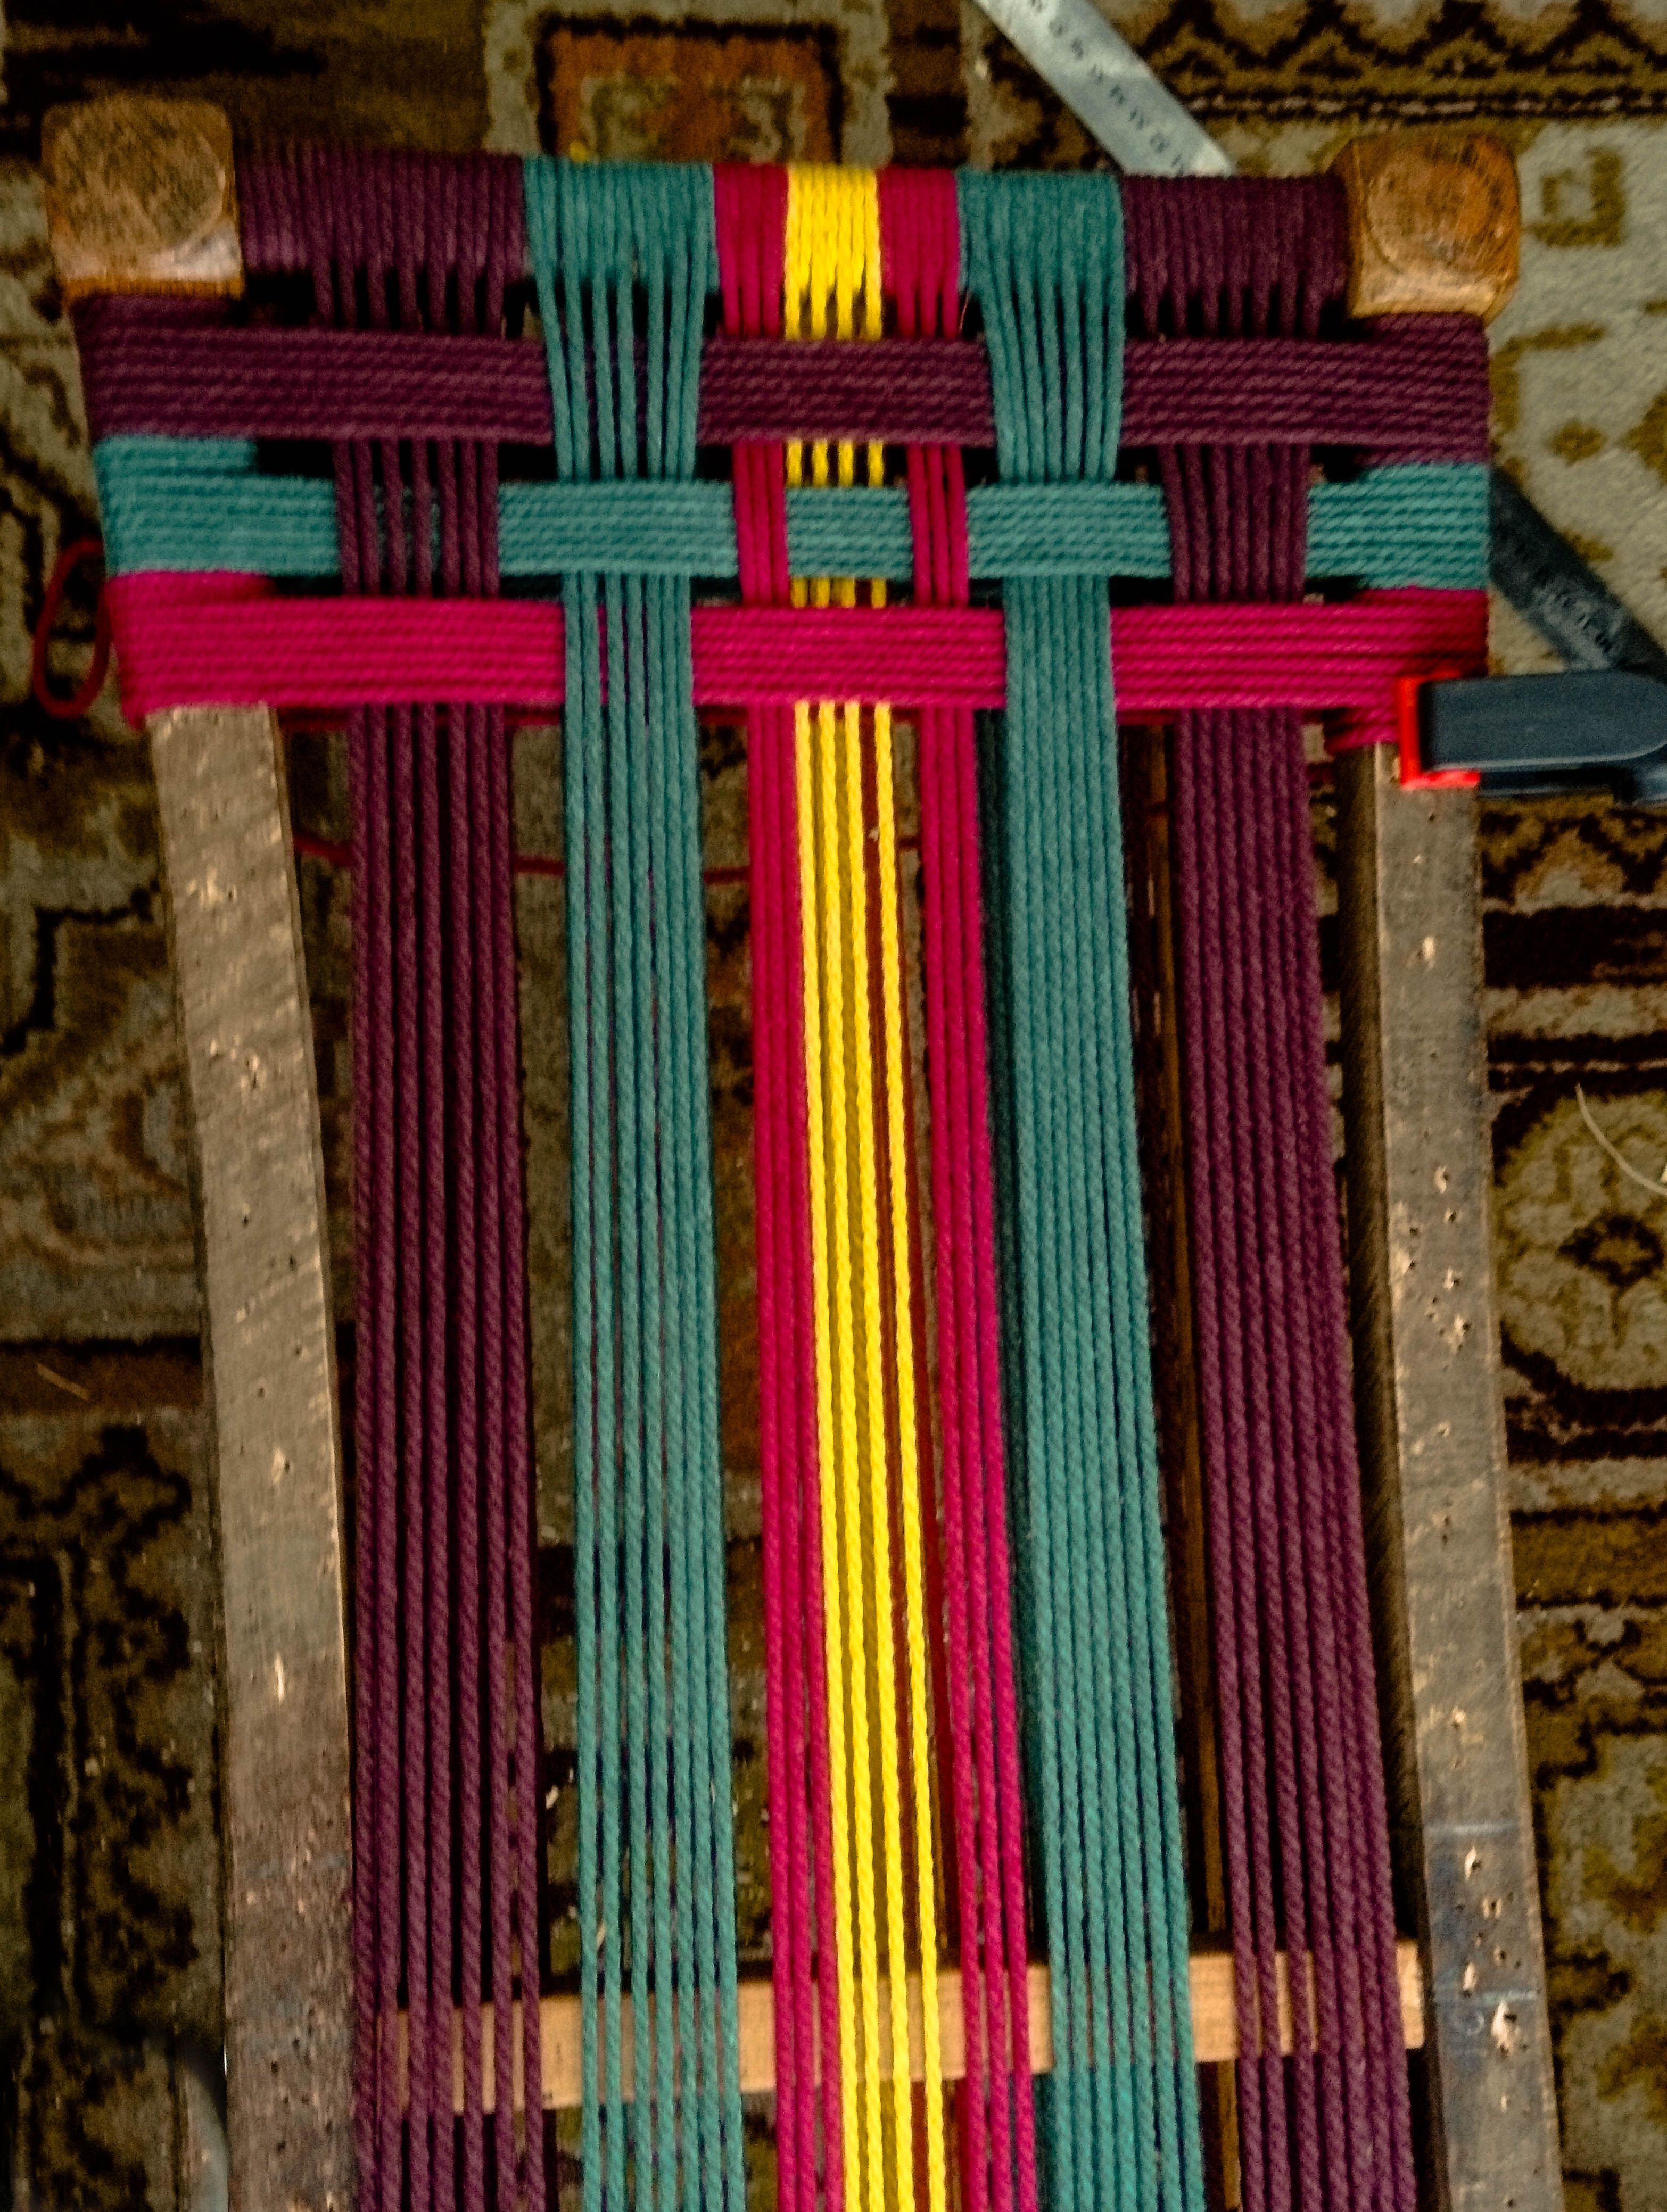
In the photo on the left you can see the warp strands in place, and the start of the weaving of the weft strands. The stabilising bar across the centre is visible at the bottom of the photo. Notice the plastic clamp, holding the cord in position, top right. These things are invaluable for seatweavers!

In order to keep the pattern symmetrical, I worked it from both ends at once, working gradually towards the middle. It was a lot of fun to do, with a few head-scratching moments!


You can buy this type of cotton cord from our website  HERE. The colours used were Burgundy, Dark Brown, Moss Green, and yellow.

You can buy the SitUpon Seats Stool Book HERE. This particular pattern isn't in it, but a number of other patterns are, and if anyone particularly wants this pattern I'll draw it up and add it to the book. (All our instruction books are written, illustrated, printed and bound by me, Ally McGurk, at SitUpon Seats. They are not currently available from bookshops.)


Monday, 14 February 2022

THE RUSH SEAT

the rush seat

Evidence of rush seating turns up throughout history. The Vikings almost certainly used this method, and in mediaeval Italy simple rush-seated ladderback chairs were commonly used. Strangely, considering that the best rushes grow in England, there's no direct evidence of rush-seating in Britain before the 17th century, though it's quite likely it was used before this.

The pattern is simple, and must have been discovered numerous times by different people throughout history. It's simply a matter of creating a twisted rope of some local material, and wrapping it in a particular way around a wooden frame. You simply attach it to the inside of the frame, and work your way round, over and under, over and under, until you reach the centre of the seat. This produces a strong, but comfortable seat.

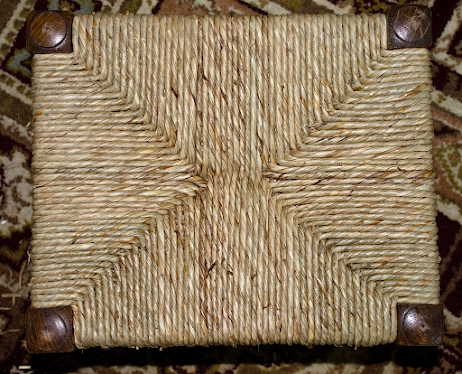
Above: stool seated with ready-twisted natural rush.

In the UK, the common bulrush, Scirpus lacustris, grows in the River Thames and various Norfolk rivers, and this is the plant used most of all in this country for rush seating. In the USA the leaves of the cattail plant are more usually used, and each country will have its favourite seating material. 

Anything that can be twisted into a rope can be used for this pattern. We often make seats in the rush pattern using seagrass, Danish cord, cotton cord and flax cord, and I've seen chairs made with brightly coloured nylon rope.

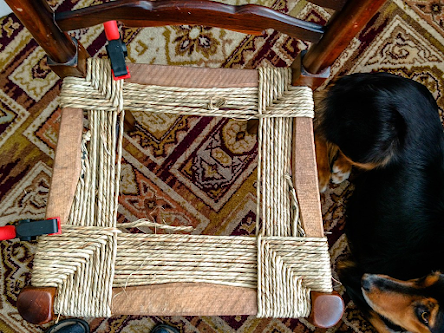
Above: a chair seat partly wrapped with rush cord. You can see the working end hanging loose in the middle. The next strand of rush will be tied to this, and the knot will be hidden inside as work progresses. We use plastic clamps to hold the rush in place as we work.

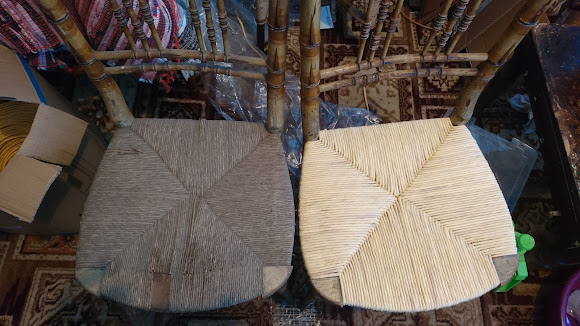
Above: two chairs from a set of four. The one on the left is still to be done, while the one on the right has been stripped down, cleaned and polished, and seated with paper rush.

You can find various materials suitable for the rush pattern on the e-commerce part of our website, SitUpon Seats Shop.

If you'd like us to reseat your chair, just send us an email to ally@situponseats.co.uk or give us a ring on 01900 813200.


Thursday, 25 March 2021

CANED CARVERS


I've just finished these two lovely old cane chairs. The backs were still in reasonable condition, but the seats were worn out and needed recaning. 

It's been a real pleasure of a job to do. The hardest part was matching the colour of the seats to the old, dark cane of the backs.

Chair cane is, of course, VERY glossy and hard on the front, and most wood treatments just tend to slide off, or, worse still, come off on people's clothes, so one has to be careful. When it does stay put, it tends to be very transparent and pale. But I think I've finally found the solution. 

I'd never tried water-based varnish on cane before, and didn't think it would stick, so I did numerous experiments with offcuts of ready-woven cane until I found the perfect combination. In the end I used a couple of layers of dark, spirit-based woodstain, plus, on top, another couple of layers of water-based, medium brown, gloss varnish. It's a good colour, and a nice looking finish. The customer was delighted!

The other interesting thing about these seats is that there are the same number of holes along the back and the front, although, like most chairs, the seats are trapeziod – i.e., wider at the front. It's much commoner to find there are more holes at the front, which leaves the seatweaver with the problem of making the sides neat, where extra strips of cane have to share holes with the usual horizontal ones. 

Having the same number back and front makes a much cleaner looking pattern. You hardly notice the slight distortion as the verticals splay out towards the front. I think it's a much more sensible solution, and if I were making my own chairs from scratch, I'd definitely do this.


Monday, 24 August 2020

WOODEN STOOL KITS ARE BACK!

        I know a lot of people have been missing our lovely wooden stool kits recently, which we couldn't get for a few months. At last, a new batch of wooden frames is on its way, so if you want one  – or some! – get your orders in, as they're sure to sell out soon.

    All these kits now come with our updated, new edition instruction books – either The SitUpon Stool Book, or The SitUpon Rush Pattern Book

    I'll be  updating the photos on the KITS PAGE as soon as the wooden frames arrive later this week.

    Please note, we are still awaiting new stock of cotton cord, but there's still a selection of nice colours if  you want a kit using this material. 


Monday, 17 August 2020

Seagrass stools

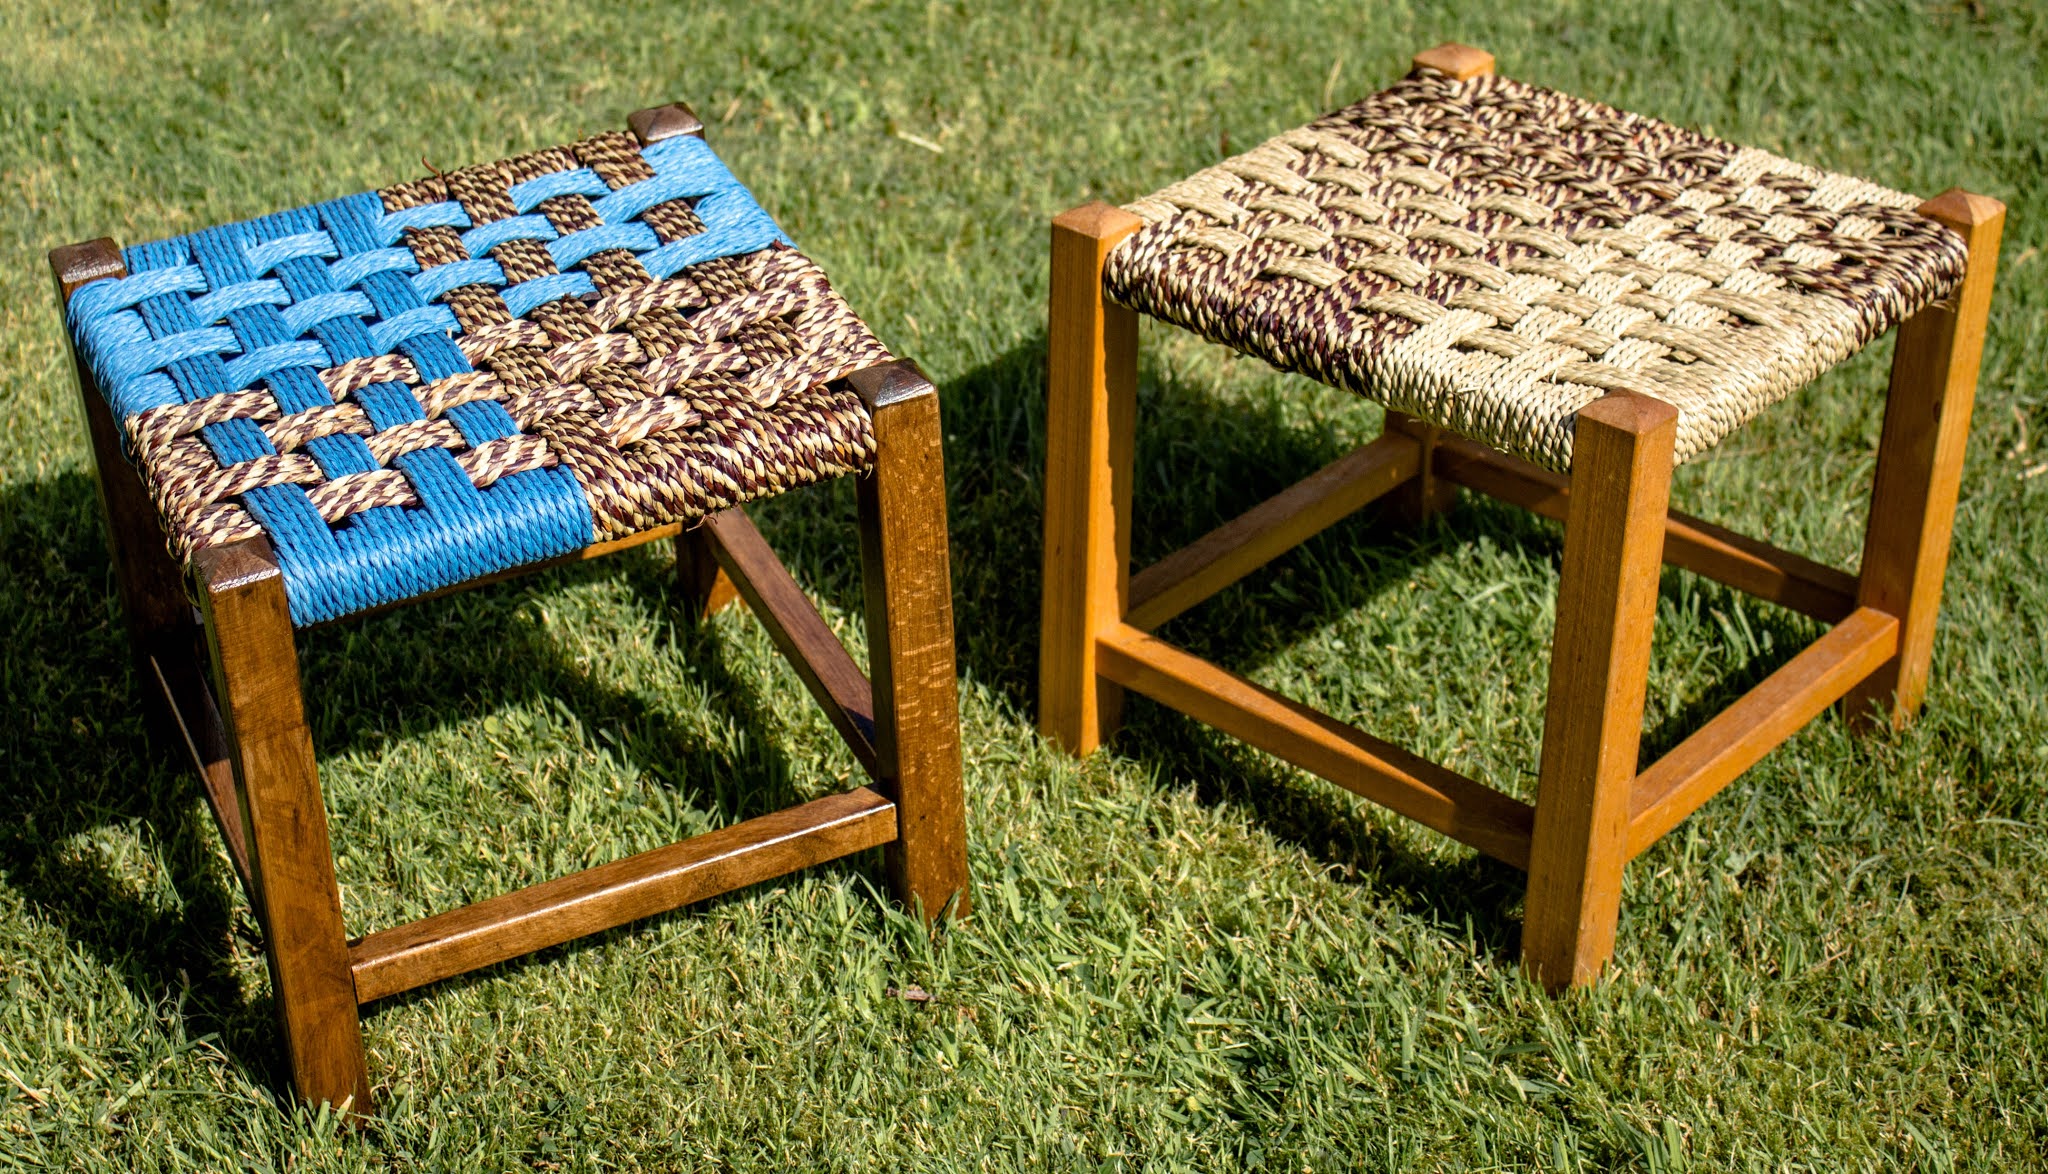
I've just been refurbishing a couple of nice solid stools. The one on the left has been done with a mixture of 2-tone seagrass and blue Danish cord, and the one on the right has 2-tone seagrass along with standard seagrass.  

The blue Danish cord is unique, I believe. I got a roll of it from the factory shortly before they closed down for good, and was reliably informed that this was an experimental colour which never went into production. It's a really nice shade of blue, and the stool reminds me of a clear sunny day in winter, with the bare branches of the trees against a blue sky.

I was very tempted to keep them for myself, but they are for sale!  Just £76 each, plus postage. Haven't got around to listing them on the site yet, but fire off an email if you're interested.


Wednesday, 22 April 2020

THE FINISHED OFFICE CHAIR

Here we are, all done!


I'm quite pleased with it. I know the front of the armrests is a little lacking in neatness - must try to improve my technique there, but if you can't learn on your own chairs, where can you?

Anyway, it's lovely to be sitting on something the right height for my short legs again (about 15½" from the floor to the seat.)

Tuesday, 21 April 2020

I don't usually do upholstery, but ...

... I thought this would be a good time to refurbish my poor, neglected old office chair.

When we first set up in business I bought this chair second hand, and replaced all the worn old fabric on it with nice, colourful, flowery stuff. It looked great! And  for me it's been the most comfortable office chair I've ever parked my bum on.

However, a number of years have passed since then, during which the chair has had a lot of use, and it's now in a really sorry state, as you can see below.


My comfy chair: BEFORE

I unscrewed the back, the armrests and the seat, and stripped off all the fabric and the horrid old foam. The back and seat are made from nice solid plywood, so it's a fairly straightforward job to replace the foam with new stuff.

The armrests, though, had seen better days. They're made from a type of moulded plastic with a bit of give in it, attached to a piece of plywood.  One is actually broken, with a piece missing at the front, and the other is all chewed up where some previous person had tried to staple a cover on it.  (I suspect this is actually the third time this chair has been recovered.)

So Steve, my brilliant partner-in-crime, has made new armrests for me, from plywood. He's even extracted the screw-in sockets to hold the bolts that fix the armrests to the arms, and fitted them into new holes in the new rests.

I've used two types of fabric for the new covers. The first is an orange, striped fabric from my stash; the other is some nice heavyweight denim from a pair of discarded jeans. I've sewn them together to produce a blue stripe down the middle of the seat and back.

Then it was just a matter of gluing the foam to the seat and back panels (using contact adhesive), covering said foam with tightly stretched lining fabric (held on with staples on other side) in order to produce a nice curved shape round the sides, and then the same again with the newly-made cover. So the back and seat look great! I'm almost tempted just to use it and forget about the armrests, but that would be cheating.

So the armrests are sitting outside on the picnic table at this very moment, waiting for the glue to dry before I put them through the same process of lining fabric, and then cover fabric. I should get them finished before bedtime! (Though there's another little problem that still needs solving, and it would help a lot if I could remember where I put that slab of Fimo about 10 years ago ... More on this later.)

I'm really looking forward to sitting on it again. The substitute chair upon which I currently sitting is not nearly as comfy.

Photos of the finished chair very soon!

And in the meantime, here's what I found underneath the seat. I guess Jim Oakes (with his nice handwriting) was quite proud of his work back in 1984. I wonder what he'd think if he knew one of the chairs he'd worked on was still in constant use all these years later, and being recovered for a 3rd time?


Wednesday, 8 April 2020

We're still here for you!

The coronavirus pandemic is a  horrible thing for us all to live through, but if we've got to stay at home, we might as well be doing something useful with our time.

Here at SitUpon Seats, we're lucky to run our business from home, so we're here for you right through it all - same phone number, same email address as before. We're not going anywhere, but we'd love to spend a bit of our time chatting to customers and helping you to decide which seatweaving project to undertake.

SAD OLD CHAIRS

Any sad old chairs lurking in your attic, or garage?

We have several in our own attic, and I'll probably get round to reseating some of them at long last. Usually too busy with our customers' chairs!

Sad old cane chair, awaiting some TLC.
Here's a nice old cane chair, ready to strip down and reseat. 
Have  you got one like this, waiting for a bit of TLC?  
One of our caning kits would do the job nicely! 
Just click the link!


Or maybe there's a rush chair needing renovation?

Sad rush chair.
Here's a couple in our attic, which would look much better at the kitchen table. 

Another sad rush chair.
Have you got one like this?
A hank of ready-twisted rush would do the job, or maybe some seagrass or Danish cord. We have the instruction books, and  we're here to give you the best advice.

Ready twisted rush

Seagrass

Danish cord


Friday, 3 April 2020

The basic rush pattern

This pattern will work with most types of cord, including Danish cord, seagrass, cotton cord, and ready twisted rush. It's suitable for any square seat. For seats which are wider at the front than the back, or rectangular rather than square, please see The SitUpon Rush Pattern Book. (see below)


Here's the basic method for creating a seat in the rush pattern.
Our instruction books will give you more details.
Fig,1: Small stool frame.
Fig.2: Attaching the cord

We're starting with a typical small stool, about 300mm (12") square. This particular stool  has already been glued together, and stained with dark woodstain. Notice that there's no need to stain the middle of the top frame, as it will be hidden by the weaving material.


ATTACHING THE CORD

See Fig.2.
Cut a good length of cord. The longer it is, the fewer knots  you'll have to hide, but don't let it get too unwieldy. The cord is attached with a tack or staple to the bottom left corner and then goes over the front of the frame.


Fig.3: Second wrapping


See Fig.3.
Take the cord under the left side, across the front, and over and back under the right side of the frame. Bring it up at the front, then under the front and towards the back.


See Fig.4
Fig.4. Wrapped all the way round.
Keep turning the stool clockwise as you work, and repeat the same over-and-under pattern at each corner until you get back to the first one.

Use clamps to hold the cord in place as you go, to prevent it slipping.

Keep it tight!


Fig.5. Attaching new length of cord
See Fig. 5.
Keep going round and round until you get to the end of the length of cord. Now tie a new piece on, making sure the knot is somewhere in the middle where it will be hidden by layers of wrapping.


Fig. 5a. Untidy underneath
Each time  you come to the end of length of cord, use a blunted screwdriver to tidy up the cord, making sure the diagonals are straight, and ease the cord on the frame so that everything's at right angles. Then  turn the seat over and tidy  up the cord underneath. It'll probably look a bit untidy like Fig. 6a.  Try to make the underside as neat as the top, like Fig.6b.


Fig 6b. Tidied up underneath


Fig. 7. Nearly finished!

See Fig.7
Keep going round and round, adding more cord when needed, tidying up above and below.

When you get to this stage, measure everything you can, to make sure all angles are right, all diagonals are straight, all gaps still to be done are the same size. Tidy up along the edges of the frame and underneath.


Fig.7. The finished seat
See Fig.8
Be careful with the final strands of cord. Make sure there are no gaps either on the edges, or the centre. 

Tie off the end on to another strand underneath, and voila! There's your seat!


PS - This is a shortened version of the instructions, which can be seen in much greater detail in our instruction book, The SitUpon Rush Pattern Book. (see below)


THE SITUPON RUSH PATTERN BOOK
This book describes the traditional rush pattern on rectangular seats and trapezoid seats,  using ready twisted rush, paper rush, seagrass and other materials. It does not cover the use of natural rush that needs hand-twisting.
The SitUpon Rush Pattern Book by Ally McGurk £7.00
 

KITS FOR SQUARE STOOLS with various types of cord are available from this page: 

Wednesday, 18 March 2020

COVID-19 and how to avoid boredom

It's a very strange time for us all, trying to avoid contact with other humans while attempting to find something to occupy us.

As a seatweaver I'm very lucky to have work I can do with my hands, to keep me busy, but you can do this too! It's not difficult, and a very useful way to spend that isolation time.

[above] A nice old carver chair worked with a rush seat.

So tomorrow I'm going to start weaving a rush seat on a small stool, and as I go along, I'll describe the process and take photos.

The rush pattern can be worked in several different types of cord, most of which you can purchase from our website, along with our very detailed, illustrated, instruction book.

The stool itself will also be for sale at the end of the procedure, and after that, we'll try something different - rattan canework, perhaps.


Tuesday, 10 December 2019

STOOL KITS BACK IN STOCK

Just in time for Christmas, we have a few wooden stool frames in stock. They can be bought on their own, or as part of a kit with a variety of cords to weave the seat, as well as an instruction book and a weaving needle.

You can choose from ready twisted rush, seagrass, Danish cord, or your choice of two different colours of cotton cord. The kits make great Christmas presents for  your crafty friends.


These are not even listed on the website yet, so please give us a ring on 01900 813200 or email ally@situponseats.co.uk if you fancy one before Christmas. There's still time if you hurry!

Tuesday, 20 August 2019

Cotton cord and rush pages added


I've been busy this afternoon. The page for ready twisted rush is now online. Here's a close-up of our fine RT rush - lovely smooth texture, isn't it?

I've also added the huge selection of coloured cotton cord we have on offer. Lovely colours for the summer and autumn.

Have a look for the tabs at the top of the page for cotton cord, and ready twisted rush.

I wonder which I should do next? Chair cane, perhaps.

Monday, 19 August 2019

Another page added

We now have both seagrass and Danish cord for sale via this blog. You can also buy the relevant instruction books, and the tools needed for these jobs.

See the tabs above for links.

Thursday, 15 August 2019

Starting the website update at last!

Exciting times ahead. I am finally starting to transfer all our shop pages to this blog, so that the whole site will eventually be mobile friendly.  I should have done this years ago, but I keep getting sidetracked by playing music and exploring the countryside with the dog.

But I'm starting now. I've done one page already, and we'll gradually get the whole lot on here. Watch this space!

Here is the first page, for those who might like to buy some  SEAGRASS.

Wednesday, 30 March 2016

Latest things from FabLab

I've mentioned before how much I love Cockermouth FabLab, where we can play with laser cutters, 3D printers, CNC routers and other lovely things. I'm still getting to grips with the software that makes these machines do their magic, but it's gradually making sense and I'm starting to design things from scratch, rather than just drill holes for basket making.

I am so full of ideas! Just watch what I come up with, as I get better at the software!

This, now. This is one of my first things - a laser cut money box. (The red squirrel on the front is to remind us that we should try squirrelling away some of our small change.) It's a perfect fit for an Illy coffee tin, but would be find without the tin lining too.  I've been dropping all my loose coppers into this box since I made it, and there must be a couple of pounds in there already.

We're going to be offering these as kits that you can put together yourself, and finish in any way you want. (The one in the photo has had no surface treatment yet.) A few coats of varnish would be nice, but you could paint the squirrel in a fetching shade of orange if you wanted, before applying the varnish. Artists' coloured acrylic inks are good for this sort of thing. The colour won't run once it's dry so you can varnish over it.

We'll have other animals besides squirrels. Probably other local, Cumbrian animals - Herdwick sheep, ospreys ... things like that.

________________________________________

Here's another box I made. This one was made as a birthday present for Annie, but I can easily make them with any name of your choice on top.

Once again I'll be selling them as kits. I lined this one with decorative paper, but I'm not sure how secure the glue will be, and I suspect it might be better to paint the inside, and varnish the outside. But it's up to you!

We are still developing a range of these things so no prices yet, but please enquire if you're interested in buying one, or if you'd like to suggest improvements.

She looks as though she likes it. Success!

Our customers' work (4)

Ann W. recently bought a stool frame and some black polycord from us, and did an absolutely superb job of putting it together and weaving the chequerboard pattern.

The underside, which is often the part people don't bother much about, is really neat. She experimented with methods of joining in new strands of polycord, and discovered that simply using a cigarette lighter to melt the ends together works very well. If you look carefully at the photo below you can see where she had to do a repair when one of the joins came loose (from overuse by children!) but the others seem to be holding up very well. I am most impressed.


She says:  
"Recently I discovered that underneath the stool a couple of the knots that I had melted together had come unstuck so I had to do a bit of repair work with the lighter. They're a bit more blobby than I would have liked, but they are underneath so no one sees! 

The stool has been in increased demand as kids sit around the coffee table playing games, so I've decided I'll do another one." 

Polycord is an ideal material for seats that will be used by children. It's very strong, and comes in nice bright colours (red, green, blue and yellow) as well as more subtle ones like this black (also straw, white and dark brown). But the best thing is, you can wipe it clean when the kids spill food or juice on it.  

Tuesday, 19 May 2015

Picture Tray Bases

These were the logical next step after basket bases.

For ages, people have been asking me if we can get those solid old melamine tray bases, drilled with holes ready for making cane borders. We used to have a supplier, but they were becoming so expensive that they actually cost more for me to buy wholesale than our customers could charge for them, beautifully finished with nice basketwork edges ... even if we decided not to make any profit at all, they would still have been uneconomical. So - sadly - we had to stop stocking them.

But you kept asking me - "Do you stock tray bases?"

I sadly kept replying, "Sorry – no."

But I don't like disappointing my customers, so I've kept thinking about how I might manage to make some, and since FabLab opened in Cockermouth, new opportunities have arisen.

I finally found the right sort of material to drill holes in, and so - at last! - we can offer picture tray bases again.

These are not melamine - they are a hardboard composite with a cork back and a wipe-clean surface. They are a little smaller than the old ones, too. But they're still big enough to carry a couple of cups of tea and a plate of biscuits. There's a good selection of pictures, and we keep finding new ones. We can more or less make them to order. And they are affordable!

So head on over to our website, and have a look. Here's a direct link to the page:
 PICTURE TRAY BASES