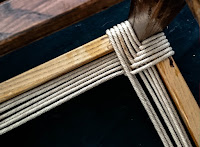
This pattern will work with most types of cord, including Danish cord, seagrass, cotton cord, and ready twisted rush. It's suitable for any square seat. For seats which are wider at the front than the back, or rectangular rather than square, please see The SitUpon Rush Pattern Book. (see below)
Here's the basic method for creating a seat in the rush pattern.
Our instruction books will give you more details.
 |
| Fig,1: Small stool frame. |
 |
| Fig.2: Attaching the cord |
We're starting with a typical small stool, about 300mm (12") square. This particular stool has already been glued together, and stained with dark woodstain. Notice that there's no need to stain the middle of the top frame, as it will be hidden by the weaving material.
ATTACHING THE CORD
See Fig.2.
Cut a good length of cord. The longer it is, the fewer knots you'll have to hide, but don't let it get too unwieldy. The cord is attached with a tack or staple to the bottom left corner and then goes over the front of the frame.
 |
| Fig.3: Second wrapping |
See Fig.3.
Take the cord under the left side, across the front, and over and back under the right side of the frame. Bring it up at the front, then under the front and towards the back.
See Fig.4
 |
| Fig.4. Wrapped all the way round. |
Use clamps to hold the cord in place as you go, to prevent it slipping.
Keep it tight!
 |
| Fig.5. Attaching new length of cord |
Keep going round and round until you get to the end of the length of cord. Now tie a new piece on, making sure the knot is somewhere in the middle where it will be hidden by layers of wrapping.
 |
| Fig. 5a. Untidy underneath |
 |
| Fig 6b. Tidied up underneath |
 |
| Fig. 7. Nearly finished! |
See Fig.7
Keep going round and round, adding more cord when needed, tidying up above and below.
When you get to this stage, measure everything you can, to make sure all angles are right, all diagonals are straight, all gaps still to be done are the same size. Tidy up along the edges of the frame and underneath.
 |
| Fig.7. The finished seat |
See Fig.8
Be careful with the final strands of cord. Make sure there are no gaps either on the edges, or the centre.
Tie off the end on to another strand underneath, and voila! There's your seat!
PS - This is a shortened version of the instructions, which can be seen in much greater detail in our instruction book, The SitUpon Rush Pattern Book. (see below)
THE SITUPON RUSH PATTERN BOOK
This book describes the traditional rush pattern on rectangular seats and trapezoid seats, using ready twisted rush, paper rush, seagrass and other materials. It does not cover the use of natural rush that needs hand-twisting.
The SitUpon Rush Pattern Book by Ally McGurk £7.00


No comments:
Post a Comment