Wednesday, 22 April 2020

THE FINISHED OFFICE CHAIR

Here we are, all done!


I'm quite pleased with it. I know the front of the armrests is a little lacking in neatness - must try to improve my technique there, but if you can't learn on your own chairs, where can you?

Anyway, it's lovely to be sitting on something the right height for my short legs again (about 15½" from the floor to the seat.)

Tuesday, 21 April 2020

I don't usually do upholstery, but ...

... I thought this would be a good time to refurbish my poor, neglected old office chair.

When we first set up in business I bought this chair second hand, and replaced all the worn old fabric on it with nice, colourful, flowery stuff. It looked great! And  for me it's been the most comfortable office chair I've ever parked my bum on.

However, a number of years have passed since then, during which the chair has had a lot of use, and it's now in a really sorry state, as you can see below.


My comfy chair: BEFORE

I unscrewed the back, the armrests and the seat, and stripped off all the fabric and the horrid old foam. The back and seat are made from nice solid plywood, so it's a fairly straightforward job to replace the foam with new stuff.

The armrests, though, had seen better days. They're made from a type of moulded plastic with a bit of give in it, attached to a piece of plywood.  One is actually broken, with a piece missing at the front, and the other is all chewed up where some previous person had tried to staple a cover on it.  (I suspect this is actually the third time this chair has been recovered.)

So Steve, my brilliant partner-in-crime, has made new armrests for me, from plywood. He's even extracted the screw-in sockets to hold the bolts that fix the armrests to the arms, and fitted them into new holes in the new rests.

I've used two types of fabric for the new covers. The first is an orange, striped fabric from my stash; the other is some nice heavyweight denim from a pair of discarded jeans. I've sewn them together to produce a blue stripe down the middle of the seat and back.

Then it was just a matter of gluing the foam to the seat and back panels (using contact adhesive), covering said foam with tightly stretched lining fabric (held on with staples on other side) in order to produce a nice curved shape round the sides, and then the same again with the newly-made cover. So the back and seat look great! I'm almost tempted just to use it and forget about the armrests, but that would be cheating.

So the armrests are sitting outside on the picnic table at this very moment, waiting for the glue to dry before I put them through the same process of lining fabric, and then cover fabric. I should get them finished before bedtime! (Though there's another little problem that still needs solving, and it would help a lot if I could remember where I put that slab of Fimo about 10 years ago ... More on this later.)

I'm really looking forward to sitting on it again. The substitute chair upon which I currently sitting is not nearly as comfy.

Photos of the finished chair very soon!

And in the meantime, here's what I found underneath the seat. I guess Jim Oakes (with his nice handwriting) was quite proud of his work back in 1984. I wonder what he'd think if he knew one of the chairs he'd worked on was still in constant use all these years later, and being recovered for a 3rd time?


Wednesday, 8 April 2020

We're still here for you!

The coronavirus pandemic is a  horrible thing for us all to live through, but if we've got to stay at home, we might as well be doing something useful with our time.

Here at SitUpon Seats, we're lucky to run our business from home, so we're here for you right through it all - same phone number, same email address as before. We're not going anywhere, but we'd love to spend a bit of our time chatting to customers and helping you to decide which seatweaving project to undertake.

SAD OLD CHAIRS

Any sad old chairs lurking in your attic, or garage?

We have several in our own attic, and I'll probably get round to reseating some of them at long last. Usually too busy with our customers' chairs!

Sad old cane chair, awaiting some TLC.
Here's a nice old cane chair, ready to strip down and reseat. 
Have  you got one like this, waiting for a bit of TLC?  
One of our caning kits would do the job nicely! 
Just click the link!


Or maybe there's a rush chair needing renovation?

Sad rush chair.
Here's a couple in our attic, which would look much better at the kitchen table. 

Another sad rush chair.
Have you got one like this?
A hank of ready-twisted rush would do the job, or maybe some seagrass or Danish cord. We have the instruction books, and  we're here to give you the best advice.

Ready twisted rush

Seagrass

Danish cord


Friday, 3 April 2020

The basic rush pattern

This pattern will work with most types of cord, including Danish cord, seagrass, cotton cord, and ready twisted rush. It's suitable for any square seat. For seats which are wider at the front than the back, or rectangular rather than square, please see The SitUpon Rush Pattern Book. (see below)


Here's the basic method for creating a seat in the rush pattern.
Our instruction books will give you more details.
Fig,1: Small stool frame.
Fig.2: Attaching the cord

We're starting with a typical small stool, about 300mm (12") square. This particular stool  has already been glued together, and stained with dark woodstain. Notice that there's no need to stain the middle of the top frame, as it will be hidden by the weaving material.


ATTACHING THE CORD

See Fig.2.
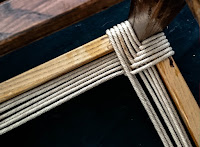
Cut a good length of cord. The longer it is, the fewer knots  you'll have to hide, but don't let it get too unwieldy. The cord is attached with a tack or staple to the bottom left corner and then goes over the front of the frame.


Fig.3: Second wrapping


See Fig.3.
Take the cord under the left side, across the front, and over and back under the right side of the frame. Bring it up at the front, then under the front and towards the back.


See Fig.4
Fig.4. Wrapped all the way round.
Keep turning the stool clockwise as you work, and repeat the same over-and-under pattern at each corner until you get back to the first one.

Use clamps to hold the cord in place as you go, to prevent it slipping.

Keep it tight!


Fig.5. Attaching new length of cord
See Fig. 5.
Keep going round and round until you get to the end of the length of cord. Now tie a new piece on, making sure the knot is somewhere in the middle where it will be hidden by layers of wrapping.


Fig. 5a. Untidy underneath
Each time  you come to the end of length of cord, use a blunted screwdriver to tidy up the cord, making sure the diagonals are straight, and ease the cord on the frame so that everything's at right angles. Then  turn the seat over and tidy  up the cord underneath. It'll probably look a bit untidy like Fig. 6a.  Try to make the underside as neat as the top, like Fig.6b.


Fig 6b. Tidied up underneath


Fig. 7. Nearly finished!

See Fig.7
Keep going round and round, adding more cord when needed, tidying up above and below.

When you get to this stage, measure everything you can, to make sure all angles are right, all diagonals are straight, all gaps still to be done are the same size. Tidy up along the edges of the frame and underneath.


Fig.7. The finished seat
See Fig.8
Be careful with the final strands of cord. Make sure there are no gaps either on the edges, or the centre. 

Tie off the end on to another strand underneath, and voila! There's your seat!


PS - This is a shortened version of the instructions, which can be seen in much greater detail in our instruction book, The SitUpon Rush Pattern Book. (see below)


THE SITUPON RUSH PATTERN BOOK
This book describes the traditional rush pattern on rectangular seats and trapezoid seats,  using ready twisted rush, paper rush, seagrass and other materials. It does not cover the use of natural rush that needs hand-twisting.
The SitUpon Rush Pattern Book by Ally McGurk £7.00
 

KITS FOR SQUARE STOOLS with various types of cord are available from this page: